The Cloud SQL Auth Proxy works by running a local client in the local environment. Your application communicates with the Cloud SQL Auth proxy using the standard database protocol used by your database.
It uses a secure tunnel to communicate with its companion process running on the server. Each connection made through the Cloud SQL Auth proxy creates a connection to the Cloud SQL instance.
Although the Cloud SQL Auth proxy can listen on any port, it creates outbound or outbound connections to your Cloud SQL instance only on port 3307. The user does not need to configure SSL because, by default, the Cloud SQL Auth proxy provides secure access to your instances. .
Few advantages: Uses IAM permissions and database authentication; Encrypts traffic to and from the database using TLS 1.3 with 256-bit AES encryption.
Steps to Install Google Cloud SQL Proxy on Ubuntu 22.04 | 20.04
1. Requirements
• Linux Ubuntu
• Enable Cloud SQL Administration API on GCP
• User must provide Cloud SQL Auth proxy with Google Cloud authentication credentials
• A valid user account and password for the database
• Terminal access
• A non-root user with sudo rights
2. Run system update and install wget
Use the APT package manager and run the system update command to make sure your Ubuntu Linux is up to date. Also, with this setup wget tool.
sudo apt update && sudo apt install wget
3. Download Cloud SQL Authentication Proxy
Well, this tool is not available in Ubuntu 22.04 and 20.04 default repository. Therefore, we have to manually download the CloudSQL Authentication Proxy.
wget https://dl.google.com/cloudsql/cloud_sql_proxy.linux.amd64 -O cloud_sql_proxy
4. Change cloud_sql_proxy permission
By default, the downloaded script will not be allowed to be executed by the system. Therefore, we have to manually change its permission and make it executable.
chmod +x cloud_sql_proxy
5. Check version
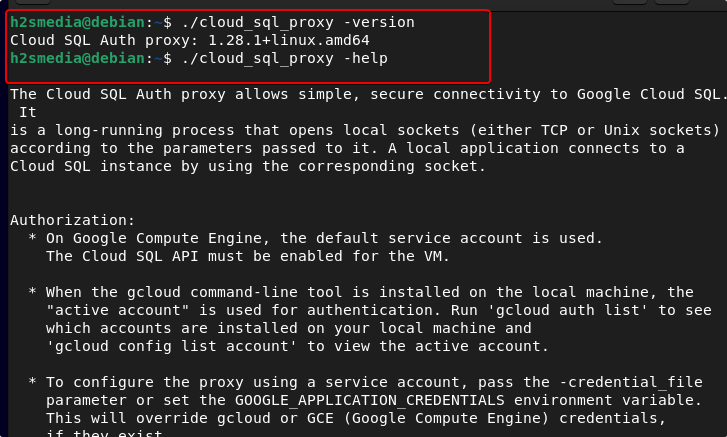
Now we can run the script to check the Cloud SQL proxy version and confirm that the system can run it.
./cloud_sql_proxy -version

6. Create a System Service for the Cloud SQL Proxy
Well, to use the script every time, we need to switch to the directory where it was placed. However, if you want to run it as a system service with predefined cloud instance details, create a systemd service.
Move the script to a secure location, where we won’t accidentally delete it.
sudo cp ~/cloud_sql_proxy /usr/local/bin
Now create a service file.
sudo nano/lib/systemd/system/cloudsqlproxy.service
Copy and paste the following details.
[Install]
WantedBy=multi-user.target

[Unit]
Description=Google Cloud Compute Engine SQL Proxy
Requires=networking.service
After=networking.service

[Service]
Type=simple
WorkingDirectory=/usr/local/bin
ExecStart=/usr/local/bin/cloud_sql_proxy -instances=your_gcp_project:region_of_instace:cloudsql_instance_name=tcp:3307 -credential_file=/var/credential.json
Restart=always
StandardOutput=journal
User=root
Replace the given values with your own in the above:
• your_gcp_project
• region_of_instace e.g us-central1
• cloudsql_instance_name
• port e.g 3307 or something else not used in the server.
Save the file by pressing – CTRL+Otype Yesthen to exit the file, press CTRL+X.
7. Start the service
Once the CloudSQL Proxy service file is created, we can start its service.
sudo systemctl daemon-reload
Start and activate the service file:
sudo systemctl start cloudsqlproxy
sudo systemctl enable cloudsqlproxy
To know more about this tool, visit the official documentation page.
Other Items:
• How To Install Oracle Java 8 64bit Ubuntu 22.04 | 20.04 LTS
• 3 Ways to Install Beekeeper Studio on Ubuntu 22.04 | 20.04 LTS
• Install Brave Browser on Ubuntu 22.04 LTS Jammy JellyFish
• How To Install Arduino IDE on Ubuntu 22.04 | 20.04
