
Install MySQL on Windows
Unlike Linux, where we can use the repositories installed on the computer to download MySQL, in Windows we must visit the following website to download it and press Go to Download page for download version that we want to install.
On the one hand you will find the installer, which occupies 5 MB, and on the other hand, all the applications necessary for the installation of MySQL, which occupies just over 400 MB. If we opt for the latter version, the installer will not download any content from the internet to install it. If we opt for the 5 MB version, an internet connection will be required to download the necessary content.
In the next window it will invite us to register on the web to download it, a step that we can skip by clicking on No thanks, I’m just starting my download.
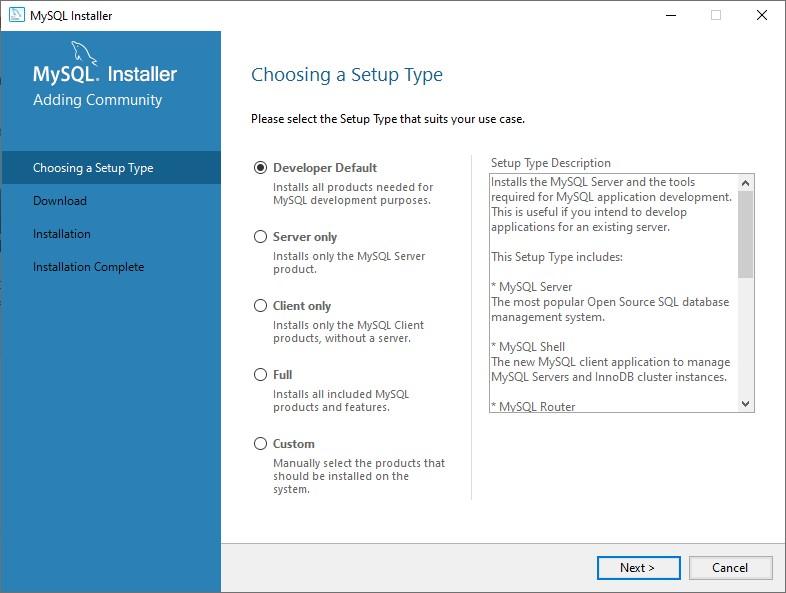
Once we have downloaded it, we run it as we do with any other file, double clicking on the file with the .msi extension and waiting for the installation process to complete. Once the process is complete, a new window will open with the MySQL installer where we must select the type of server we want to create.
- Developer Default. This is the ideal option as it will install everything you need to create a MySQL database.
- severe only. To install MySQL in server mode.
- Customer only. Install it in serverless client mode.
- Full. Install all MySQL products.
- personalized. Allows us to select the type of MySQL products we want to install.
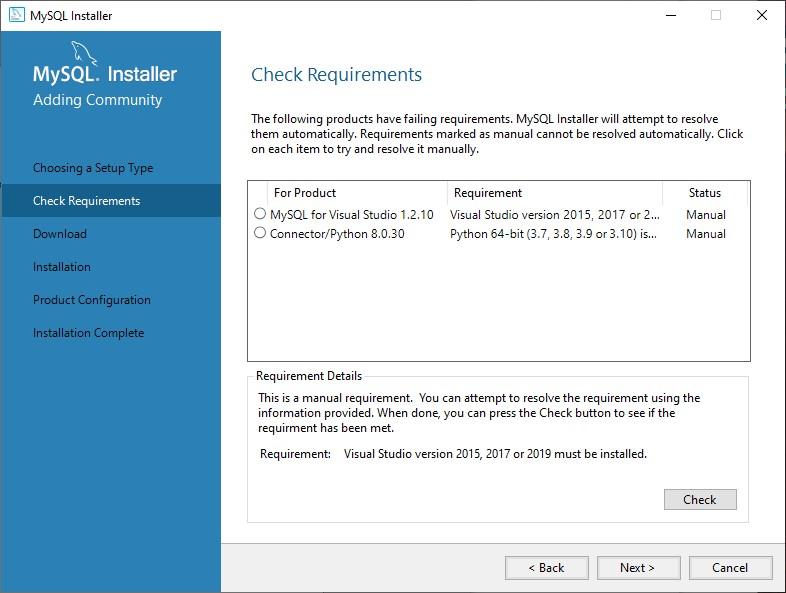
In the next window it will check if we are missing any applications to be able to use MySQL such as MySQL for Visual Studio or Connector/Phyton. If so, we will have to install them manually on our computer.
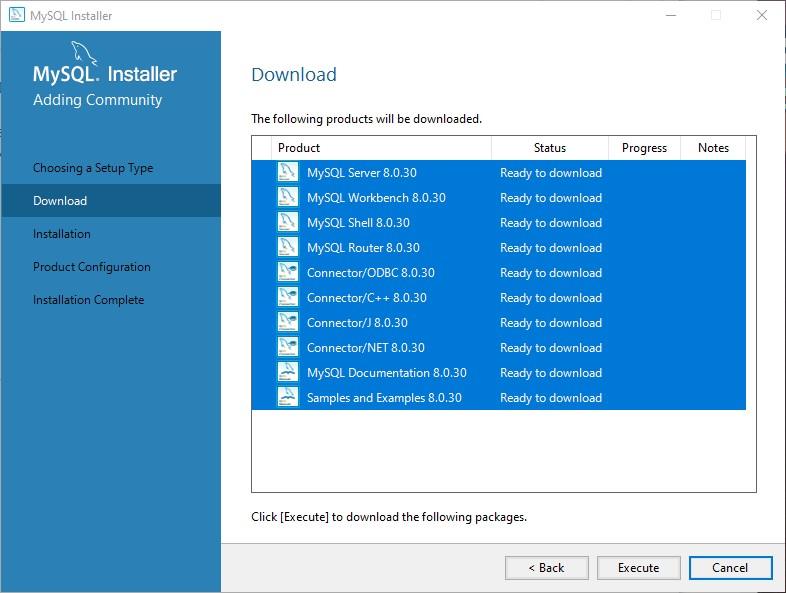
Then all the content that will be downloaded and installed on the computer will be displayed. Click Run to continue. If some of the components don’t download properly (using the base installer which is 5MB), an error will be displayed. We just have to click on try again to try downloading it again.
In the next window, the installer will prompt us to select in which folder we want to install on the computer. Once we have installed the MySQL server we need, the installer will take us to the option Product Setup, where we need to establish the TCP/IP ports and prompt Windows to allow access to the firewall. Then we have to set access password that we want to use to protect access. To access the server, we just need to run the MySQL application and access the server we created and create the database.
Steps to Install MySQL on Linux
Once our web server is up and running after installing Nginx (or any other), the first thing to do is update the list of repositories via the command
sudo apt update
Then we proceed to install mysql using the repositories we have in the Linux version using the following command
sudo apt install mysql-server
The first thing we need to do is create master password, password that will allow us to access the management and modification of the database. It is recommended to use a password manager to create a complex password to prevent other people from accessing it. Once the installation is complete, we use the command that we show you below to eliminate the default settings and block access to the database so that it is only accessible through the password that we have established.
sudo /usr/bin/mysql_secure_installation
Then it will ask us a series of questions that we must answer as shown below:
- Change root password? NOT
- Delete anonymous user? Yes
- Forbid remote root login? Yes
- Delete the test database and access it? Yes
- Reload privilege tables now? Yes
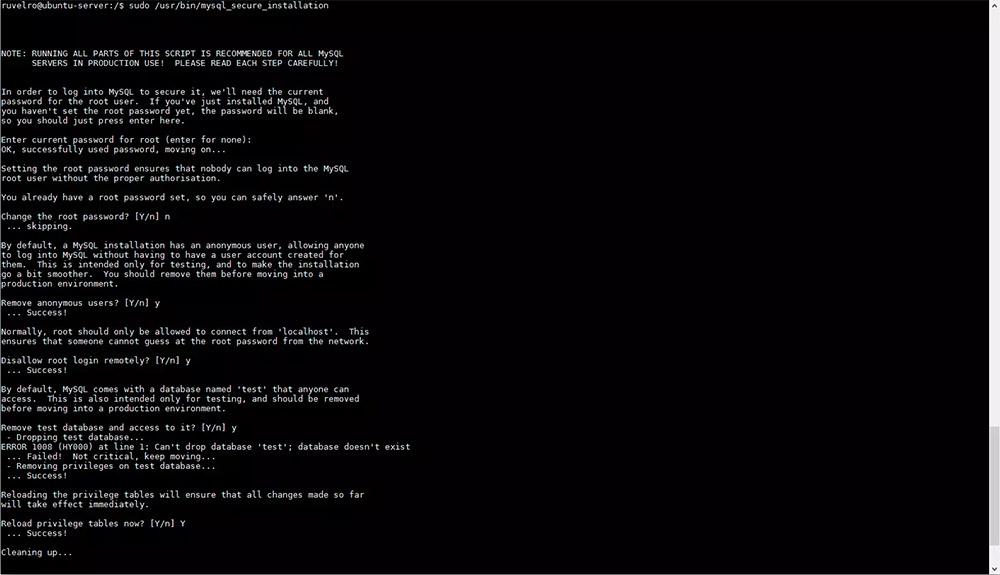
So we’ll keep the password we created, and we’ll remove anonymous user access, disable remote access, drop the sample database, and reload the privileges table.
Once we have installed MySQL, we can now create our database, as long as we have the appropriate knowledge. If not, the solution, as I mentioned above, is to install PHPMyAdmin.
How to install PHPMyAdmin
As in the previous case, most web servers are managed by Linux, but if we use a Windows server, we can also use PHPMyAdmin to manage MySQL databases more easily.
Steps for PHPMyAdmin on Windows
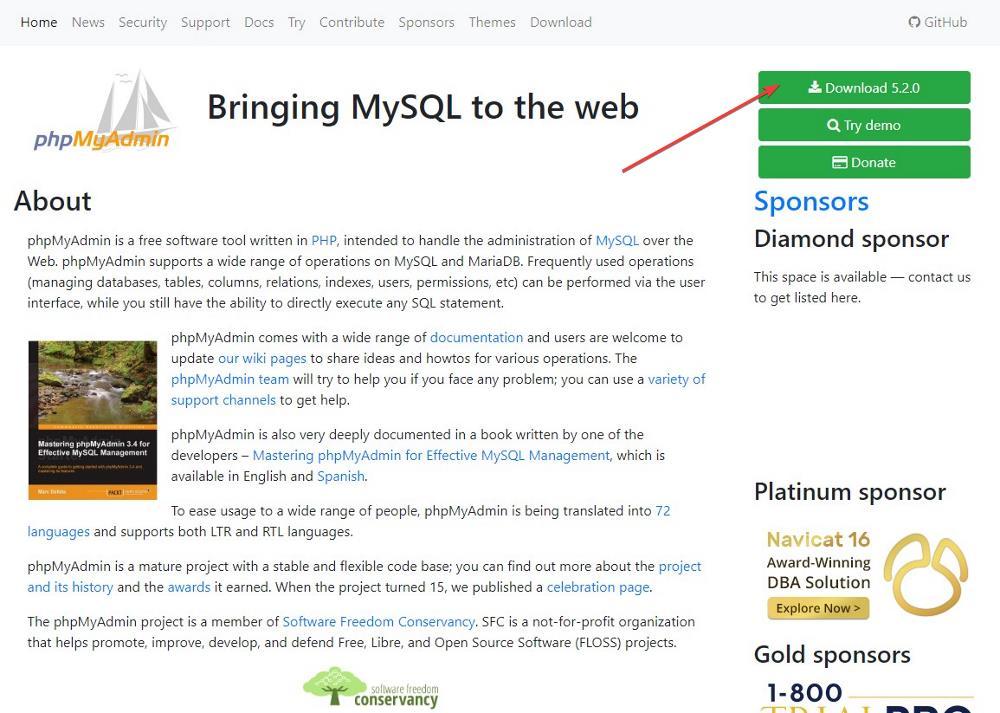
PHPMyAdmin is nothing more than a GUI for interacting with MySQL, so unless our knowledge of MySQL is limited, it won’t be necessary to install it. The first thing we have to do is download the corresponding version through the official website which we can access through the following link.
Then we unzip and copy to MySQL server directory that we previously installed. To access the server and configure it, we just have to enter the following URL in our browser (in this way it is not necessary to configure which server we want to use it on in combination with MySQL).
http://localhost/phpmyadmin/setup/index.php
Install PHPMyAdmin on Linux
The first thing we need to do is install PHPMyAdmin from the command line using the following command:
sudo apt-get install phpmyadmin
During the installation process, the first thing we must do is choose the web server where we have installed MySQL and, by the way, configure the database administrator to be able to use it with the password password that we established when installing MySQL. Once the installation of PHPMyAdmin is complete, we must enter the following commands to secure installation.
sudo phpenmod mcrypt sudo phpenmod mbstring
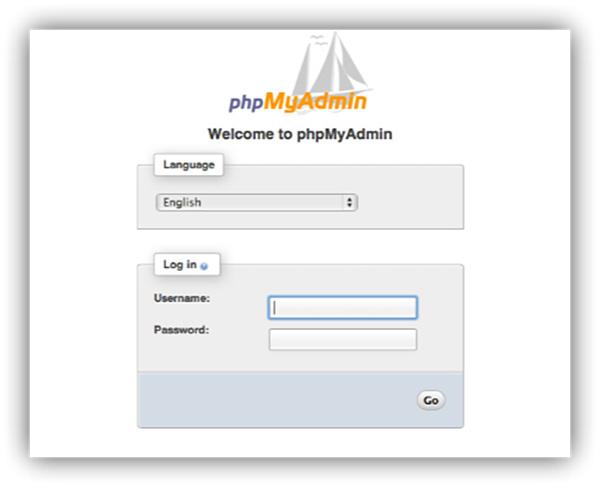
Once the process is complete, we restart the server for the changes to be applied. Once we have installed PHPMyAdmin, we use our browser to access via the following URL and we start creating and managing the database with MySQL using a graphical interface instead of the command line.
http://localhost.phpmyadmin